

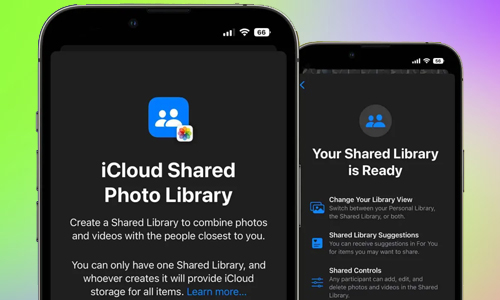
How to use iCloud Shared Photo Library on iPhone, iPad, and Mac? With iOS 16, Apple introduced a slew of intriguing new features. The iCloud Shared Photo Library is a noteworthy innovation. When you share an iCloud library with someone, they become the owner and have the ability to edit, remove, and add captions.
Even more intriguing, you may record films or take photos and post them directly to the Shared Library. I’ll teach you how to use an iCloud Shared Photo Library on iPhone, iPad, and Mac to share photos with friends and family.
Table of Contents
iCloud Shared Photo Library requirements
- All participants of the iCloud Shared Photo Library must have an iCloud account and be using one of the following to create and access the iCloud Shared Photo Library:
- An iPhone running iOS 16.1 or above
- an iPad running iPadOS 16 or later
- or a Mac running Ventura
- You can share your library with up to five people at once.
How to set up an iCloud Shared Photo Library in iOS 16?
Here is the list of 3 methods to set up an iCloud Shared Photo Library in iOS 16:
- Open the Photos app on your iPhone.
- Select Shared Library. Then click Get Started.
- Select persons from your Contacts by tapping Add Participants.
- Fill in the recipients’ field with an email or phone number, or press the cross button (+) to choose from your contacts.
- When you’re through adding people, press Add at the upper right.
- Next, press the button.
- You will now be given three options (sharing preferences):
- Except for screenshots and hidden or deleted images, you can share your full photo library.
- Sort your library’s Shared Library by identifying specific people or dates. You could do this for couples, for example. This also excludes screenshots and photographs that have been concealed or removed.
- This allows you to choose what you want to share on your own. It’s quite useful if you only want to select a few photographs. It guarantees that you only share the images you’ve chosen with the recipients.
- After selecting an option, tap Next.
- The persons with whom you are about to share your library are listed in the following menu.
- If you’re happy with the list, click Next.
Method #1. All My Photos and Videos
Select Shared Library Preview.
Continue in the top-right corner.
Method #2. Choose by People or Date
You’ll be asked to identify the newly added contacts from your images. To arrange your Shared Library by persons, tap this prompt. To proceed, you must choose at least two people. After recognising people, tap Done in the upper-right corner.
- The photos will then be sorted by date. Set the start date for your Shared Library by tapping Start Date.
- Next, press the button.
- Then choose Preview Shared Library to view the images before sharing them.
- Continue in the top-right corner.
Method #3. choosing pictures manually
- Tap the images you want to include in your Shared Library to select them.
- Tap the Add button in the upper right corner.
- Then select Shared Library Preview.
- Continue in the top-right corner.
After you’ve chosen your photos, hit Invite through Messages to send an MMS invitation to attendees, or tap Share Link to share the URL via social media. When participants are nearby, you can choose to share your library automatically or manually over Bluetooth. Finally, press the Done button.
How to save camera pictures to a Shared or Personal Library?
When you share an iCloud Library, you can choose where to save the output while recording a video or taking a photograph. For example, if you select Shared Library while shooting a photo or recording a video, the iPhone instantly shares the result.
- Look at the upper left of your iPhone camera while it is open. A double profile icon will appear (showing two persons).
- Toggle between Shared and Personal Library storage by tapping that symbol.
How to remove a participant from a Shared Library?
If you change your mind, you can delete a participant from a Shared Library:
- Open the Photos app on your iPhone or iPad.
- Select Shared Library.
- Choose the contact you want to delete.
- Remove from Shared Library by tapping the Remove button. Then click the Remove from Shared Library button.
How to delete iCloud Shared Photo Library?
To delete an iCloud Shared Library, follow these steps:
- Navigate to iPhone Settings Photos.
- Select Shared Library.
- Then, select Delete Shared Library.
- To finish, tap Delete Shared Library, then Delete Shared Library again.
How to set up an iCloud Shared Photo Library in macOS Ventura?
- Navigate to Photos. Settings from the top bar.
- Choose Shared Library.
- Then, to get started, click Get Started.
- Select your way of sharing. You have the option of selecting: All My Photos and Videos, Choose by People, Dates, or Manually.
- Continue can be found in the bottom-left corner.
- Then, to finish setting up, follow the prompt for the option you choose.

