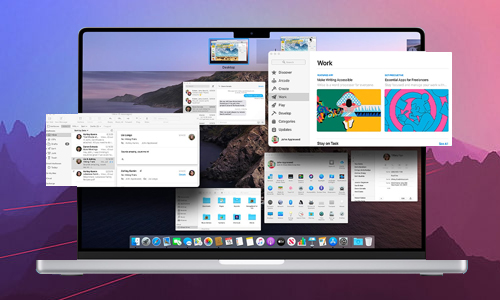
How to use Mission Control on Mac? Ever wished your Mac had an App Switcher function similar to the iPhone or iPad? Something that makes switching between windows simple and allows us to view every open window simultaneously. Mission Control on Mac is the next best thing, while it isn’t App Switcher per.
Don’t worry if you’ve used the setting before or if you’ve never heard of it; I’ve got you covered with this thorough tutorial on using Mission Control on Mac, beginning with what the feature is all about.
Table of Contents
How to use Mission Control on Mac?

Here is the list of 3 methods to use Mission Control on Mac:
Method #1. Open Mission Control
By using a trackpad or Magic Mouse gestures:
Use three or four fingers to swipe up on the trackpad, or two fingers to double-tap the Magic Mouse.
By using the keyboard shortcut or Touch Bar:
Simply press F3/the Mission Control icon to access the dedicated Mission Control key (three rectangles of varying sizes) on the Apple keyboard and Touch Bar.
On a Mac, you may also launch Mission Control by pressing Control + up arrow.
By using Launchpad or Dock:
- Launchpad open
- From the dock, click the Launchpad icon (one with multiple squares).
- Launchpad will appear after you search in Spotlight.
- Go to Finder -> Applications -> Launchpad.
- Pinch your thumb and three fingers on a trackpad (ensure that all four digits make contact)
- On Mission Control, click
By using Hot Corners:
- Go to System Preferences -> Mission Control.
- Pick Hot Corners in the bottom menu.
- There are four choices available here; select the one you want from the dropdown menu.
- Click Mission Control and OK.
Method #2. Master the use of Mission Control
Add new Spaces/desktops:
Launch Mission Control, then select the plus icon from the top-right corner.
Move or open apps between Spaces:
Launch Mission Control and move the chosen active app from one Space to another by dragging and dropping it.
In addition,
- Open the window in the new Space by dragging it toward the plus icon.
- Go to the desired space by opening Mission Control and clicking it, then launch the necessary app.
Switch between Spaces with ease:
One method is to launch Mission Control and select Space from the top menu. But the more effective usage is:
Trackpad gesture: To switch between Spaces, swipe right or left with four fingers.
Mouse gesture: Use two fingers to swipe left or right across the surface of your Magic Mouse.
Use Control () + Right Arrow () or Control () + Left Arrow () as a keyboard shortcut.
Create Split View windows:
I am a Split View addict and use this approach more frequently than the standard approach. Believe me, it’s much simpler.
- Each window can be made full-screen (tap the green button).
- Start Mission Control now.
- When you see a plus icon, drag the second window over the thumbnail of the full-screen window and drop it there.
Rearrange Spaces:
To rapidly access them and according to your workflow, while several Spaces are open, you might choose to reorder the Spaces. It’s very easy; just open Mission Control and click and drag the Spacebar in the appropriate directions.
Close Spaces in Mission Control:
Click the cross symbol in Mission Control while your mouse is hovering over the chosen window.
You may swipe up to close all of the superfluous apps, unlike the iPhone/iPad App Switcher. However, I have discovered good software that aids me in doing that.
You can close app windows from Mission Control by clicking the cross button when Mission Control Plus is running in the background. It also makes handy keyboard shortcuts available, such as ⌘+W to close a window and ⌘+Q to end an application.
Different wallpapers for different Spaces:
By default, macOS uses the background of the primary desktop for all other Spaces. To differentiate or stylize, you can alter the wallpaper in each Space, though. Additionally, even after a restart, Mac will remember the various backdrop Spaces and their associated wallpapers.
- Select the Space for which you wish to modify the wallpaper.
- Change the desktop background by selecting it with a secondary click. Alternately, select System Preferences -> Desktop & Screen Saver -> Desktop.
- Select your chosen image from the Preferences panel.
Method #3. Tweak settings
- Select Mission Control under System Preferences.
- You have the following choices here:
- Rearrange Spaces automatically depending on the most recent usage
- Go to a Space with the application’s open windows while moving between applications.
- window groups based on application
- Spaces for Displays are distinct.
- mouse and keyboard shortcuts
- Depending on your preference, choose or deselect the desired setting.


