

How to use Stage Manager in macOS Ventura and iPadOS 16? Apple released Stage Manager during WWDC 2022, a feature that will help you reduce the hassle of congested recent apps windows in macOS and iPadOS. But how can you multitask with the Stage Manager on your Mac or iPad?
To begin, you must have macOS Ventura and iPadOS 16, as well as activate it. Let’s get started with this guide, which will help you understand and make the most of Stage Manager on both Mac and iPad.
Table of Contents
What is Stage Manager?
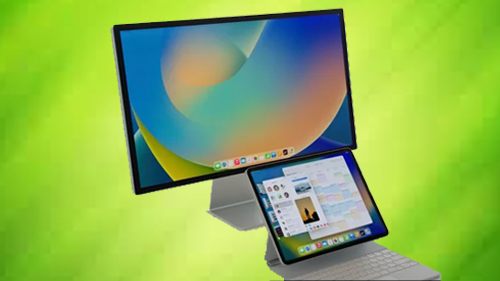
For macOS and iPadOS, the Stage Manager is a multitasking function. This function arranges the windows on your desktop so that you can simply access them and enjoy a clutter-free and confusion-free desktop.
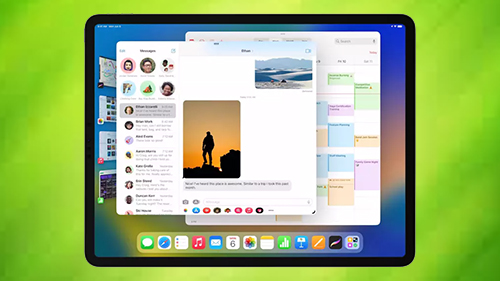
Users can combine programmes by dragging and dropping windows from the side. While using Stage Manager, the window of the programme you are currently using will be prominently displayed in the centre. The other active app windows, on the other hand, are arranged on the left-hand side in the most recently used order.
The thumbnails display a live view of its window, allowing you to see updates, such as new messages, without having to switch apps. Depending on the size of your desktop, you can view up to six thumbnails.
How to use Stage Manager in macOS Ventura?
Here is the list of 5 methods to use Stage Manager in macOS Ventura:
Method #1. Turn the Stage Manager on or off
Via Settings
- Select System Settings from the Apple Menu.
- From the sidebar, select Desktop & Dock.
- Scroll down to the section Windows & Apps (from the right-hand side).
- Turn on or off Stage Manager.
Using the Control Center
- Control Center can be accessed via the menu bar.
- To enable or disable the Stage Manager, click its icon.
Create a keyboard shortcut to toggle Stage Manager on and off.
- Navigate to the Apple menu→System Settings→Keyboard.
- Select Keyboard Shortcuts from the menu.
- Select Mission Control from this menu.
- Click the ‘none’ button next to the Stage Manager twice.
- Enter the desired keyboard shortcut here.
- Done should be selected.
Method #2. Show or hide Stage Manager from the Mac menu bar
Stage Manager can be added to Mac’s menu bar for even simpler access. Simply drag and drop the Stage Manager icon from the Control Center into the menu bar. To delete it, hold down the Command (⌘) key while clicking, dragging, and dropping the icon anywhere on the desktop.
Alternatively, go to the Apple menu→System Settings→Control Center and pick Menu Bar or Don’t Show in Menu Bar from the pop-up menu next to Stage Manager. Once in the menu bar, click the Stage Manager icon and toggle it on/off as desired. Click Stage Manager Settings to make changes.
Method #3. Change Stage Manager settings in macOS Ventura
- Navigate to the Apple menu→System Settings→Desktop & Dock.
- Next to Stage Manager, click Customize.
- Toggle on/off Recent Apps – Displays recently used apps on the left side.
- Desktop things – Displays items on the desktop.
- Next, pick Show windows from an application from the selection that appears.
- All at Once – Displays all active programme windows on the same screen.
- One at a Time – Display only the most recently used programme window on the screen. (Other windows can be accessed by clicking on them from the left.)
- To exit the menu, click Done.
Method #4. Organize Mac desktop with Stage Manager
Group apps: Start the app you desire to add. Now, activate the group and drag the app from the Recent apps section to the centre of the screen. You may also group open apps by holding down the Shift key and clicking the window’s thumbnail.
Ungroup apps: Drag the app you wish to uninstall to the left side of the screen (in the centre of the screen).
To hide/unhide an app: To open the app window, hit Command (⌘)+H. The app will no longer appear in the recent apps area. To return to the app, click it in the Dock or press Command (⌘)+Tab, then tab to choose the app and release the keys.
Reposition or overlap windows: Drag and drop the title bar to the desired spot by clicking anywhere on it. You can also combine windows.
Resize windows: Hover the mouse over the app window’s edge. When you see the resize arrow, click and drag the window’s edge to resize; once the window has resized, lift your finger.
Method #5. Manage multiple windows (Stage Manager in macOS Ventura)
Switch apps: Bring up the Recent Applications area (if it’s hidden) and select the app you wish to use from the main screen.
Switch between windows of the same app: Press and hold the Command (⌘) + character key (Left of number 1)
Minimize windows: This effectively moves the window to the side as a thumbnail without switching windows. Simply press Command (⌘)+ M or click the – (minus icon).
Drag and Drop between apps: To transfer, select and drag the items to the left side of the screen, then hover the cursor over the programme. Drop the things here as the app moves to the middle. Hover the pointer over the back window and drop the objects when the app window moves to the front if there are several windows.
How to use Stage Manager in iPadOS 16?
Here is the list of 2 methods to use Stage Manager in iPadOS 16:
Method #1. Enable or disable Stage Manager on iPad
Via Settings:
- Start by going to Settings Home Screen & Multitasking.
- Select Stage Manager.
- Toggle Stage Manager on/off on the iPad.
- You may also check/uncheck the boxes here.
- Recent Apps – Allows or disables the display of recent apps on the left side.
- Dock – When Stage Manager is engaged, unhide/hide Dock.
Via Control Center:
- Launch Control Center.
- Select the Stage Manager option.
- When activated, the backdrop of the icon turns white.
- Hard-press the Stage Manager icon to adjust its settings.
- Check/uncheck
- Recent apps
- Dock
Method #2. Multitask with multiple windows on iPad with Stage Manager
Make app groups:
- Select Add Another Window by tapping the three-dot icon at the top of a window. All recent programme windows will now be displayed; select the one you want to group.
- Drag and drop the programme from the Dock to the screen’s centre.
(To access the Dock, slide up from the bottom edge of the screen.) - Hold the app in your hand and drag it to the centre of the screen from the Recent apps list.
Resize any window: To resize the app, drag the dark curve at the left or right bottom inward or outward, then lift the finger. When using a mouse or trackpad, move the cursor to any edge and drag in/out when the resize arrow appears.
Add a window to the list of recent apps: You simply minimise the window, like in macOS. Select Minimize by tapping the three-dot icon.
Expand the window: Select Zoom by tapping the three-dot icon.
Reposition a window: Touch, hold, then drag the title bar to the desired area, then release it.
Switch between apps: You can select a different programme from the Recent applications list or the Dock. The existing collection of apps is moved to the left side, and your desired app takes its place. You can also use four or five fingers to swipe left or right.
View all currently active apps: Launch the App Switcher (swipe up from the bottom of the screen and pause in the centre).
Also Read: How to fix CoreServicesUIAgent verifying stuck on Mac?

