

Top 21 M1 MacBook Air & MacBook Pro Tricks and Tips. Apple ultimately shifted to its in-house Apple Silicon chip after 15 years of utilizing Intel CPUs in its Mac series. The first model designated the M1, outperformed all expectations in terms of performance and power efficiency. Best M1 MacBook Air & MacBook Pro Tricks and Tips.
Table of Contents
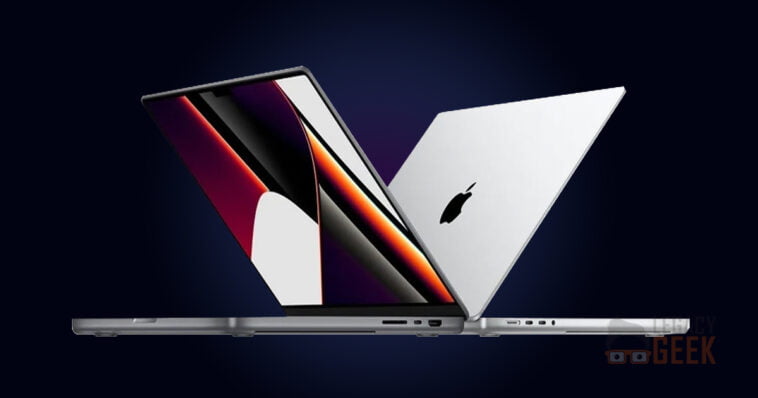
Top 21 MacBook Air & MacBook Pro Tricks and Tips
The M1 MacBook Air, for an instance, is 3.5 times faster than its predecessor and can perform complex activities such as video editing that were previously reserved for MacBook Pros and iMacs. The M1 MacBook Pro is also far superior to previous models. If you have the latest M1 MacBook Air or a MacBook Pro, Here are 21 M1 MacBook Air & MacBook Pro Tricks and Tips, and techniques you should be informed about.
1. Install iPad & iPhone Apps
The M1 SoC is built on the same architecture as the A-Series CPUs found in the iPhone and iPad. This implies that iPhone and iPad apps can now be run natively on the M1 MacBook Air and Pro.
Navigate to the Mac Program Store, search for an app (such as Overcast or Facebook), and then select the iPhone & iPad Apps tab. You may then choose the iPhone/iPad version of the program, install it like any other Mac app, and launch it using Spotlight Search or the Launchpad.
The caveat is that developers must make the iPhone and iPad versions of their programs available for the Mac, thus popular apps (such as Instagram or Gmail) may not be available on the Mac App Store.
Now also can see a list of apps that you’ve already purchased/installed on your iPhone and iPad. To access it, simply choose your profile from the lower-left corner of the Mac App Store and navigate to the iPhone & iPad Apps menu. Then, begin installing the programs you desire.
2. Change the Keyboard Backlight
If you wish to change the brightness of the keyboard on your M1 MacBook Air, you won’t see the necessary secondary function row controls any longer. Instead, you must use the Control Center (one of the most significant new features in macOS Big Sur).
Simply click the Control Center icon in the menu bar’s upper right corner. Then, choose Keyboard Brightness and drag the illumination slider to the left or right to adjust the brightness.
3. Do Not Disturb, Dictation, and Spotlight
Apple may have removed the keyboard lighting controls from your M1 MacBook Air’s function row, but the identical keys still point to other essential macOS functions. Dictation and Do Not Disturb can now be activated by hitting F5 and F6, respectively. Furthermore, the F4 key (which formerly launched the Launchpad) now opens Spotlight Search.
4. Include Icons in the Menu Bar
As you may have observed, the Control Center collects practically every icon that was previously featured in the menu bar. That certainly makes things neater, but it also makes accessing your Wi-Fi or Bluetooth menus a hassle because you have to crawl into the Control Center all the time.
Fortunately, you shouldn’t have to put up with that; simply drag the icons from the Control Center and reposition them on the menu bar. This is also true for controls like Keyboard Brightness and Display.
5. Look at Touch Alternatives
Most iPhone and iPad apps that can be installed on the Mac are built for usage on touch displays… which your M1 MacBook clearly lacks. As a remedy, Apple has created a feature known as Touch Alternatives. It’s a collection of trackpad gestures and keyboard button combinations that may be used to interact with such apps. You may access the instruction set by selecting the Touch Alternatives option from the menu bar of a touch-based program.
6. Put That to Sleep
The M1 processor is a beast. Close and reopen the lid, and your MacBook Air or Pro, like the iPhone and iPad, should wake up instantaneously. That is more than enough justification to put it to sleep in order to save battery life.
However, most M1 MacBooks last for hours longer (up to 18 and 20 hours of video playback time on the Air and Pro versions, respectively) than their Intel equivalents, allowing you to easily breeze through a whole day even if you leave it running all the time.
7. Display Battery Percentage
In terms of battery life, the M1 MacBook Air and Pro do not display the percentage of battery life on the menu bar by default. This is an Apple design decision in macOS Big Sur that applies to all MacBooks in general. You must now bring up the Battery Status menu by selecting the battery indicator if you wish to check the battery percentage.
However, if you like, you may restore the battery percentage indicator to the menu bar. To do so, open the Apple menu, go to System Preferences, and then click the Dock & Menu Bar icon. Then, on the Battery side-tab, select the Show Percentage checkbox.
8. Examine the Battery Usage Statistics
macOS Big Sur also includes a new Battery panel that displays battery usage statistics, similar to the iPhone and iPad. Select the Battery icon in the System Preferences window to access it. It’s really handy if the battery on your M1 MacBook starts to drain rapidly and you’re stumped as to why. The Battery panel now includes the Energy Saver settings from previous macOS versions.
9. Turn off Wallpaper Tinting
If you didn’t like the wallpaper tinting on your previous MacBook, you don’t have to put up with it anymore. Uncheck the Allow wallpaper tinting in Windows option in System Preferences > General.
10. Control Notifications Quickly
macOS Big Sur includes a redesigned Notification Center. Notifications are now layered by app, making them much easier to manage. Even better, you can control notifications directly.
Simply right-click on a notice or notification stack from a certain app. Then, choose Deliver Quietly to send notifications to the Notification Center secretly, or Turn Off to deactivate future alerts from the app.
11. Set a Color Accent
If you’re sick see the same blue buttons & icons on your M1 MacBook Air or Pro, experiment with changing the Accent color. Bring up the System Preferences window, click General, and then choose your favorite color from the Accent color strip. You should notice changes everywhere right away.
12. Change the Accent Color to Multicolor
macOS Big Sur also includes a multicolor option, which can be found under System Preferences > General, to the left of the Accent color strip. If you enable it, each app can have its own accent color.
13. Examine Apps for M1 Compatibility
Not all apps that you install for your M1 MacBook Air or Pro are Apple Silicon optimized. Nonetheless, the M1 chip is so fast that it can run programs written for Intel using the included Rosetta 2 Translation Environment. However, software intended for both CPUs which Apple refers to as ‘Universal’ should launch faster and function better on your M1 MacBook Air.
To see if an app has native support for the M1 chip, open the Finder and navigate to the Applications folder. Then, right-click an app and choose to Get Info from the contextual menu. If Application (Universal) appears next to Kind, the software has been optimized for the M1 processor. If you see Application (Intel), the app will operate in a translated form with Rosetta 2.
14. Always keep your apps up to date
If you have any non-universal programs on your Mac, make sure to update them on a regular basis because they will almost certainly include native support for Apple Silicon sooner rather than later. To install the most recent updates, go to the Mac App Store and select the Updates option. If you downloaded an app from somewhere other than the Mac App Store, check for an update option within the app itself.
15. Widget Management and Editing
macOS Big Sur has iPhone-style widgets, which may be accessed via the Notification Center on your M1 MacBook Air or Pro. Although you can’t drag them on the desktop or stack them on top of one another, you can quickly add and remove widgets and choose between different sizes by going to the widgets gallery. To do so, go to the bottom of the Notification Center and select Edit Widgets.
Furthermore, you may swap between sizes by right-clicking any widget without having to navigate to the widgets gallery. In some widgets, a right-click menu option called Edit Widget allows you to customize how the widget works. You can use it, for example, to alter the time zones in the World Clock widget.
16. Add Third-Party Widgets
With a quick trip to the App Store, you can also install a slew of third-party apps that support widgets. If you despise browsing the App Store, try this Apple-curated tale instead.
17. Reinstate Safari to Your Life
Safari receives a big performance boost in macOS Big Sur, making it up to 50% quicker than Chrome. Things are even better on the M1 MacBooks, where you can have dozens of tabs open without crashing. If you use a high-performance browser like Chrome, consider giving Safari another shot.
18. Watch YouTube in 4K resolution
Safari also supports YouTube in 4K resolution. To clarify, your MacBook’s M1 chip is so fast that it can handle several streams of 2160p video without breaking a sweat.
19. Use the Photos App to Edit Videos
Video editing is best left to iMovie or Final Cut Pro on your M1 MacBook Air or Pro. If you’re in a rush, the Photos app in macOS Big Sur should come in handy. You now have access to all of the edit options that were previously only available to photos. To try them out, switch to Edit mode while watching a video.
20. Personalize Safari
To summarise, Safari includes a fully configurable Start Page that makes it insanely simple to add your own flair. Simply pick the Customize icon in the lower-right corner of the screen to instantly enable or disable features such as Favorites, Frequently Visited, Privacy Report, and so on. You can also add backdrops to the Start Page, either by selecting one of the built-in backgrounds or by uploading your own photographs.
21. Bring Your M1 MacBook Air or Pro Update
The M1 MacBook Air and M1 MacBook Pro are both fantastic machines. However, they are still in their early stages, and you will undoubtedly encounter problems, glitches, and stability difficulties as you use them. As a result, make sure to get the most recent system software upgrades (which usually fix known issues) as soon as they become available.
macOS Big Sur has also made changes and updates faster and less obtrusive, so there’s no reason to avoid them. To update your Mac, go to System Preferences > Software Update and install any updates that are available. If you want your Mac to update itself automatically, tick the box next to Automatically keep my Mac up to date.
Apple has done an excellent job of migrating from Intel to Apple Silicon, and you should be in for a thrilling ride with your M1 MacBook Air or Pro, with blazing-fast performance, improved thermals, and all-day battery life. Don’t forget to check out these macOS Big Sur tips and techniques for even more ways to maximize your experience.

